What if I said that there’s a camera that:
- Is low cost at $65.
- Runs MicroPython.
- And can be expanded with shields just like an Arduino/RPi.
Meet OpenMV!
I met Kwabena Agyeman, the founder of OpenMV, during the PyImageSearch Gurus Kickstarter campaign in January 2015. At that time, Kwabena and the OpenMV team were running a Kickstarter of their own. Kwabena’s Kickstarter raised a lot more funds than mine, which really demonstrates (1) the value of the OpenMV product and (2) the eagerness of the embedded community to work with such a tool.
Since the OpenMV Kickstarter, the OpenMV team has been on a mission to provide a low cost, Python-ready, and easy to use camera system for developers and engineers working on embedded computer vision projects.
Given the success of OpenMV so far, perhaps it’s no surprise that there is an active community of developers. You’ll definitely have the support needed to make your project a success. When I started building the barcode scanning system for this post I was incredibly impressed by the responsiveness of their users and forums.
In today’s blog post, you’ll be introduced to OpenMV, their fancy IDE, and we’ll even build your own barcode scanning system.
To get started with the OpenMV cam and barcode decoding with computer vision, just keep reading.
Looking for the source code to this post?
Jump right to the downloads section.
Reading barcodes with Python and OpenMV
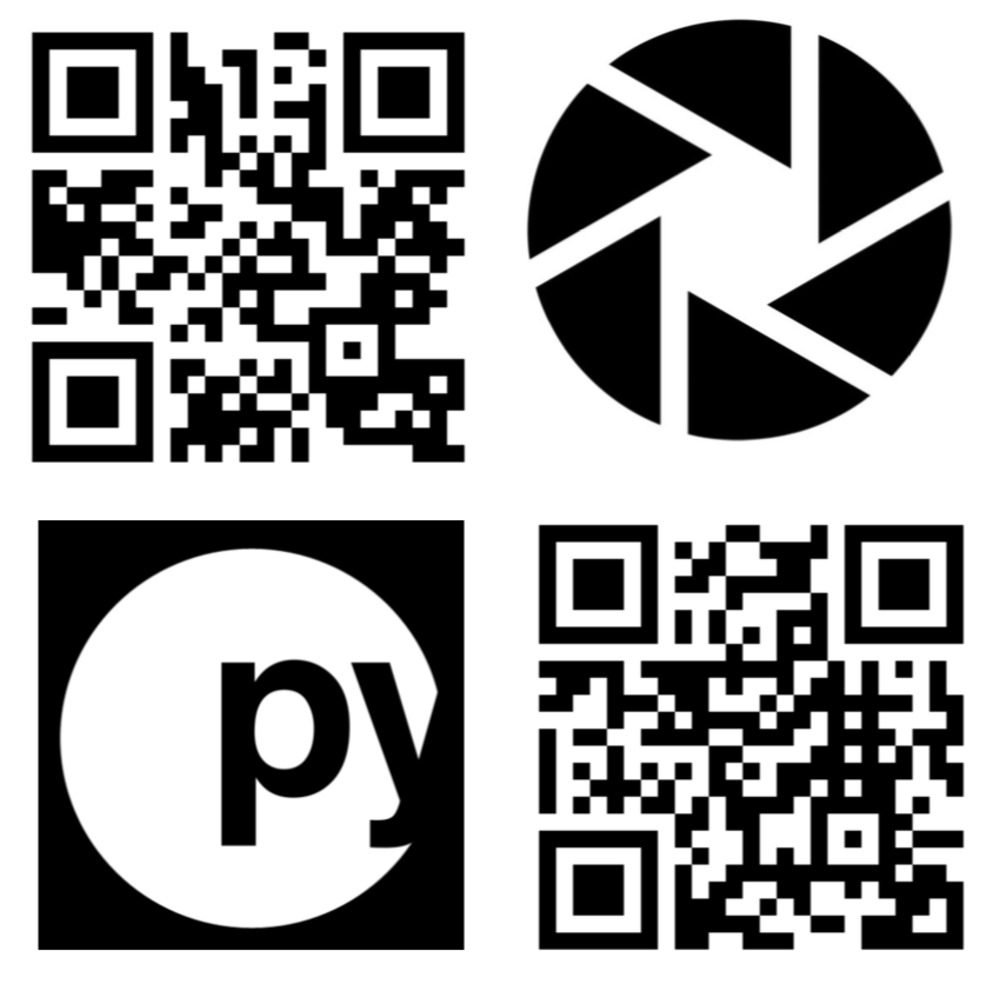
Figure 1: The OpenMV can read QR codes among many types of codes — all with built in libraries!
There’s no way of getting around barcodes in today’s world.
Every grocery item or Amazon package you receive has them. Every time you board an airplane or rent a car, barcodes are used. And heaven forbid, the a barcode could be associated with your identity on a hospital wristband during an emergency visit!
But why?
Simply put, barcodes are an easy way for computers to associate an item with a database. It’s therefore important that barcodes are decoded properly so that databases can be updated.
Typical barcode readers use a photoelectric cell to “see” the code. Check out this post by Chris Woodford on Barcodes and barcode scanners.
Given the prominence of cameras in today’s age, we can actually use image processing to detect and decode barcodes.
In a previous post here on PyImageSearch, I demonstrated how to detect barcodes with Python and OpenCV.
Detecting is one piece of the puzzle.
The other piece is decoding the barcode into a useful string.
Unfortunately, OpenCV does not contain built-in barcode detection + reading functionality…
…but there are a few popular libraries for barcode detection, one of which is ZBar. Satya Mallick, a PyImageConf 2018 presenter, wrote a great post about ZBar last month on his blog.
Using ZBar and other similar barcode reading libraries is one method to accomplish the task.
The other option is to use embedded tools and libraries such as OpenMV.
In fact, OpenMV makes it so easy to detect and read barcodes that you could:
- Build your own barcode scanning device
- Create an automated part inspection system on an assembly line
- Utilize OpenMV in a hobby project to help you scan and organize components and peripherals in your workshop
- Use OpenMV to teach middle school or high schoolers about embedded programming
The OpenMV cam
Figure 2: The OpenMV camera is a powerful embedded camera board that runs MicroPython.
Aimed at being the “Arduino of Machine Vision”, the OpenMV cam is embedded (no OS) and is expandable via several available shields (just like an Arduino).
It is also dead-simple to use — you write code with MicroPython (unlike an Arduino).
Python users and readers of this blog will feel at home when building embedded computer vision projects with MicroPython for the OpenMV.
The OpenMV camera is quite capable and would fit well in a small robotics project with servo motors or even in a automated part inspection assembly line.
You can easily interface the OpenMV with other hardware, sensors, microcontrollers, and SBCs over communication protocols such as SPI, I2C, WiFi, and USB.
OpenMV will typically work best if it just has one or two tasks to perform as it does have limited memory (31KB is allocated for scripts). If you need to record stills or video you may plug in a microSD.
Image processing capabilities of the OpenMV include:
- Haar cascades
- Thresholding
- Blob detection
- Drawing lines, circles, and rectangles
- Recording GIFs and MJPEGs
- Reading barcodes (this post)
- Template matching
- …and more!
For the full list, be sure to check out the docs.
Do you need a particular lens for your application? One differentiator is the Standard M12 Lens Mount. Now you can attach that telescopic zoom or fisheye lens for your project. I sure do wish that the Raspberry Pi PiCamera has a lens mount like the OpenMV does.
Barcode detection and decoding with OpenMV and Python
Once you’ve installed the OpenMV IDE, fire it up. We’ll be doing all of our coding in the OpenMV IDE.
Let’s begin by creating a file called
openmv_barcode.py:
# import necessary packages
import sensor
import time
import image

# import the lcd optionally
# to use the LCD, uncomment Lines 9, 24, 33, and 100
# and comment Lines 19 and 20
#import lcd
On Lines 2-4 we import our required MicroPython/OpenMV packages.
Optionally, on Line 9, you can import the
lcdpackage which is required if you want to use the LCD shield.
Next, let’s set up the camera sensor:
# reset the camera
sensor.reset()

# sensor settings
sensor.set_pixformat(sensor.GRAYSCALE)

# non LCD settings
# comment the following lines if you are using the LCD
sensor.set_framesize(sensor.VGA)
sensor.set_windowing((640, 240))

# LCD settings
# uncomment this line to use the LCD with valid resolution
#sensor.set_framesize(sensor.QQVGA2)

# additional sensor settings
sensor.skip_frames(2000)
sensor.set_auto_gain(False)
sensor.set_auto_whitebal(False)
The settings on Lines 12-29 are self explanatory, so please read the code and comments.
I do want to point out that the LCD requires a resolution that fits the screen (
sensor.QQVGA2).
Note: I tried and tried to figure out how to use the full resolution and then make a scaled image which would fit on the LCD, but was unable. Because of this, if you do elect to use the LCD, you’ll be trying to decode barcodes at a lower resolution (which isn’t optimal for traditional 1D barcodes). Needless to say, the LCD is still a good debugging tool, and I wanted to include it so that you can see that it’s very easy to use. As always, if you are able to solve this problem, then I encourage you to leave me a comment below the post to share with me and the community.
I’d also like to point out Line 27. In the “hello world” example you’ll see a keyword argument
time=2000to
sensor.skip_frames. Keyword arguments aren’t supported in this context, so be sure to use this syntax shown on Line 27 (especially if you are working through the “hello world”).
Next, let’s perform initializations:
# initialize the LCD
# uncomment if you are using the LCD
#lcd.init()

# initialize the clock
clock = time.clock()
You’ll want to uncomment Line 33 if you are using the LCD (see the previous code block).
Line 36 initialize our clock for FPS calculations
From there we’ll create (1) a lookup table and (2) a convenience function for determining the type of barcode:
# barcode type lookup table
barcode_type = {
        image.EAN2: "EAN2",
        image.EAN5: "EAN5",
        image.EAN8: "EAN8",
        image.UPCE: "UPCE",
        image.ISBN10: "ISBN10",
        image.EAN13: "EAN13",
        image.ISBN13: "ISBN13",
        image.I25: "I25",
        image.DATABAR: "DATABAR",
        image.DATABAR_EXP: "DATABAR_EXP",
        image.CODABAR: "CODABAR",
        image.CODE39: "CODE39",
        image.PDF417: "PDF417",
        image.CODE93: "CODE93",
        image.CODE128: "CODE128"
}

def barcode_name(code):
        # if the code type is in the dictionary, return the value string
        if code.type() in barcode_type.keys():
                return barcode_type[code.type()]

        # otherwise return a "not defined" string
        return "NOT DEFINED"
As you can see on Lines 39, where I defined a
barcode_typedictionary, the OpenMV can detect and decode quite a few different barcode styles.
That being said, I didn’t have luck with all of them, so the PDF included with the “Downloads” section of this blog post doesn’t include every type of barcode.
Lines 57-63 define a convenience function for grabbing the barcode type without risk of throwing a Python key exception (the OpenMV does not handle exceptions well).
From there, let’s get down to business and start capturing and processing frames! We’ll begin by starting a
whileloop:
# loop over frames and detect + decode barcodes
while True:
        # tick the clock for our FPS counter
        clock.tick()

        # grab a frame
        img = sensor.snapshot()
The first step is to tick the clock for our FPS counter (Line 68).
From there you should grab a frame with
sensor.snapshot(Line 71).
Now, let the fun begin!
We’ve got an image, so let’s see what we can do with it:
# loop over standard barcodes that are detected in the image
        for code in img.find_barcodes():
                # draw a rectangle around the barcode
                img.draw_rectangle(code.rect(), color=127)

                # print information in the IDE terminal
                print("type: {}, quality: {}, payload: {}".format(
                        barcode_name(code),
                        code.quality(),
                        code.payload()))

                # draw the barcode string on the screen similar to cv2.putText
                img.draw_string(10, 10, code.payload(), color=127)
Here we’re finding standard, non-QR codes. All we need to do is call
img.find_barcodes(which encapsulates all barcode detection + reading functionality) and loop over the results (Line 74).
Given the detected barcodes we can:
- Draw a bounding box rectangle around the detected barcode (Line 76).
- Print the type, quality, and payload (Lines 79-82).
- Draw the string on the screen (Line 85). Unfortunately (according to the docs) there is no current way to draw the string in a larger font.
That’s really all there is to it!
QR code decoding is done in a similar fashion:
# loop over QR codes that are detected in the image
        for code in img.find_qrcodes():
                # draw a rectangle around the barcode
                img.draw_rectangle(code.rect(), color=127)

                # print information in the IDE terminal
                print("type: QR, payload: {}".format(code.payload()))

                # draw the barcode string on the screen similar to cv2.putText
                img.draw_string(10, 10, code.payload(), color=127)

        # display the image on the LCD
        # uncomment if you are using the LCD
        #lcd.display(img)

        # print the frames per second for debugging
        print("FPS: {}".format(clock.fps()))
This loop mimics the standard barcode loop, so be sure to review it for details.
Outside of the loop, if you’re using the LCD, you’ll want to display on it (Line 100).
Lastly, we can easily print the FPS (frames per second) in the terminal on Line 103.
OpenMV Barcode Decoding Results.
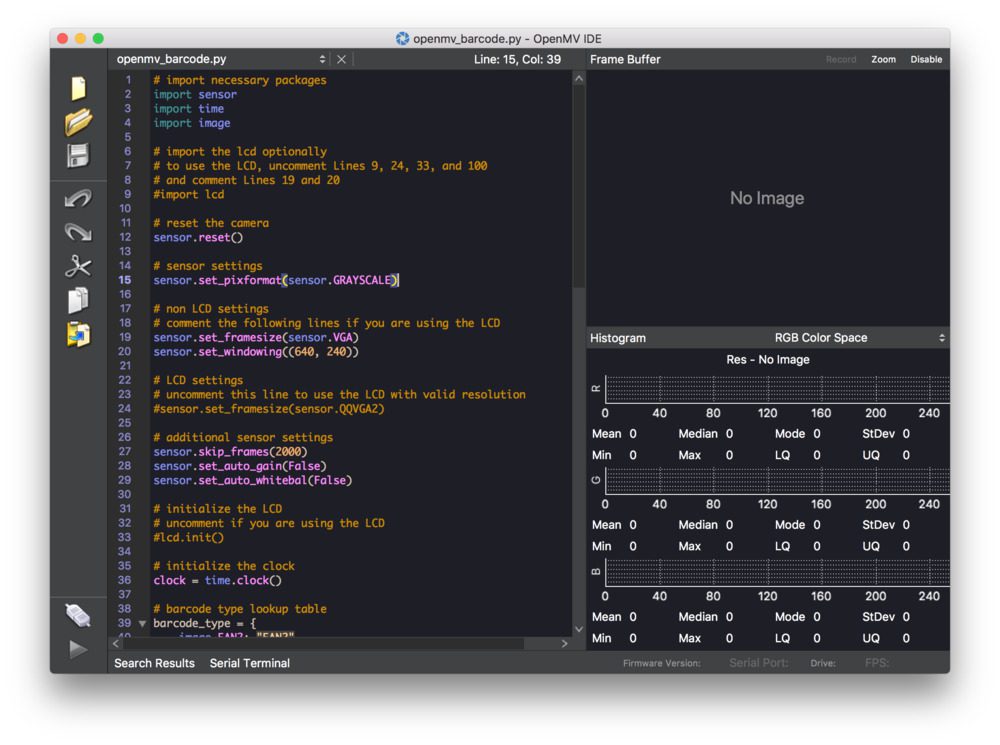
Figure 3: The OpenMV team has put together an awesome IDE for computer vision development. This is what you see when you first open the IDE and load a program.
First, connect your OpenMV cam via USB to your computer.
Then Fire up the IDE as shown in Figure 3.
From there, click the connect button in the lower left.
The IDE may prompt you to update your firmware (which I did without a hitch by clicking the button and waiting about 3-5 minutes).
When you’re ready with your program loaded in the editor, click the green play/program button also in the lower left. This button will set up the OpenMV with your code.
Be patient. It takes about 45-90 seconds for the MicroPython code to compile to machine code and get flashed on the processor. There isn’t a status indicator, so you just need to be patient.
Before long, if you’re printing to the terminal, you’ll see the data such as FPS or barcode information — that’s your queue that everything is working. You’ll also see a live view from the camera sensor in the top right viewfinder.
Now let’s try some barcodes!
In the “Downloads” section, I’ve included a PDF of barcodes for you to print and scan. Here’s what we’re working with:
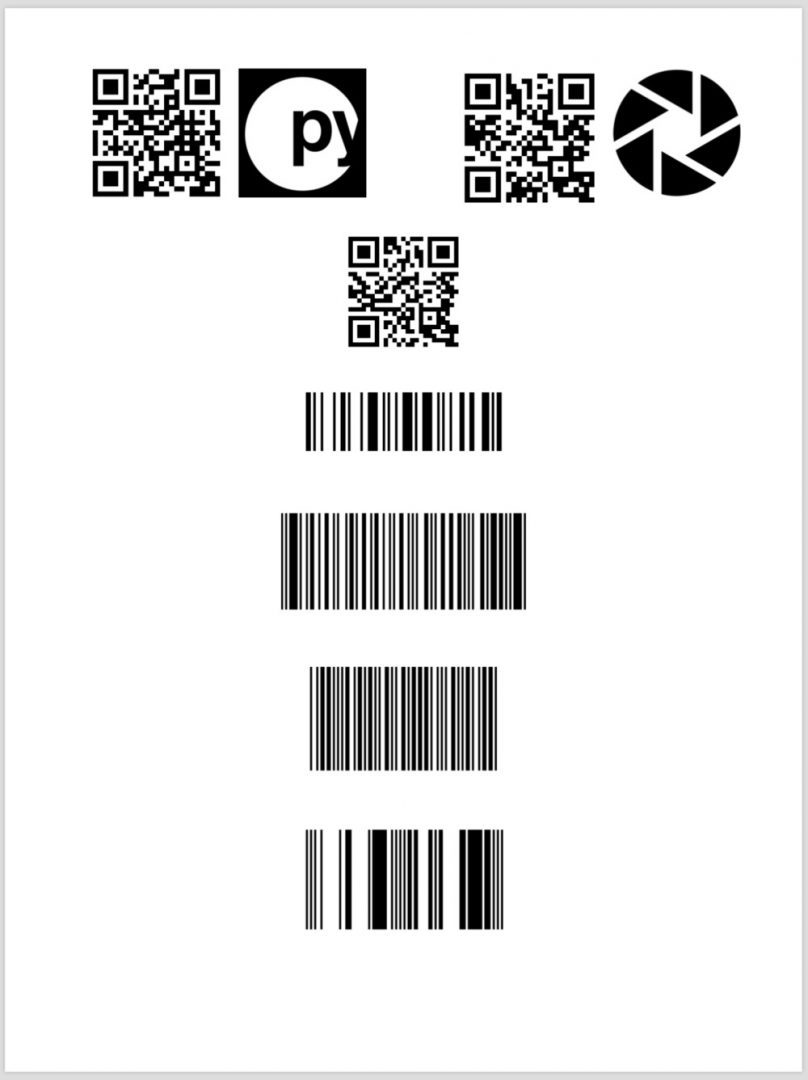
Figure 4: Sample barcodes for testing with the OpenMV camera. Included are QR, CODE128, CODE93, CODE39, and DATABAR barcode images. You may print a PDF from the “Downloads” section of this blog post.
You can see the results here from the IDE’s built in terminal:
FPS: 2.793296
type: QR, payload: https://www.pyimagesearch.com/
FPS: 2.816901
type: QR, payload: https://openmv.io/
FPS: 2.941176
type: QR, payload: http://pyimg.co/dl4cv
FPS: 3.831418
type: CODE128, quality: 48, payload: guru
FPS: 4.484305
ype: CODE93, quality: 15, payload: OpenMV
FPS: 3.849856
type: CODE39, quality: 68, payload: DL4CV
FPS: 3.820961
type: DATABAR, quality: 83, payload: 0100000000020183
FPS: 4.191617
Screenshots of each code and the terminal are below:
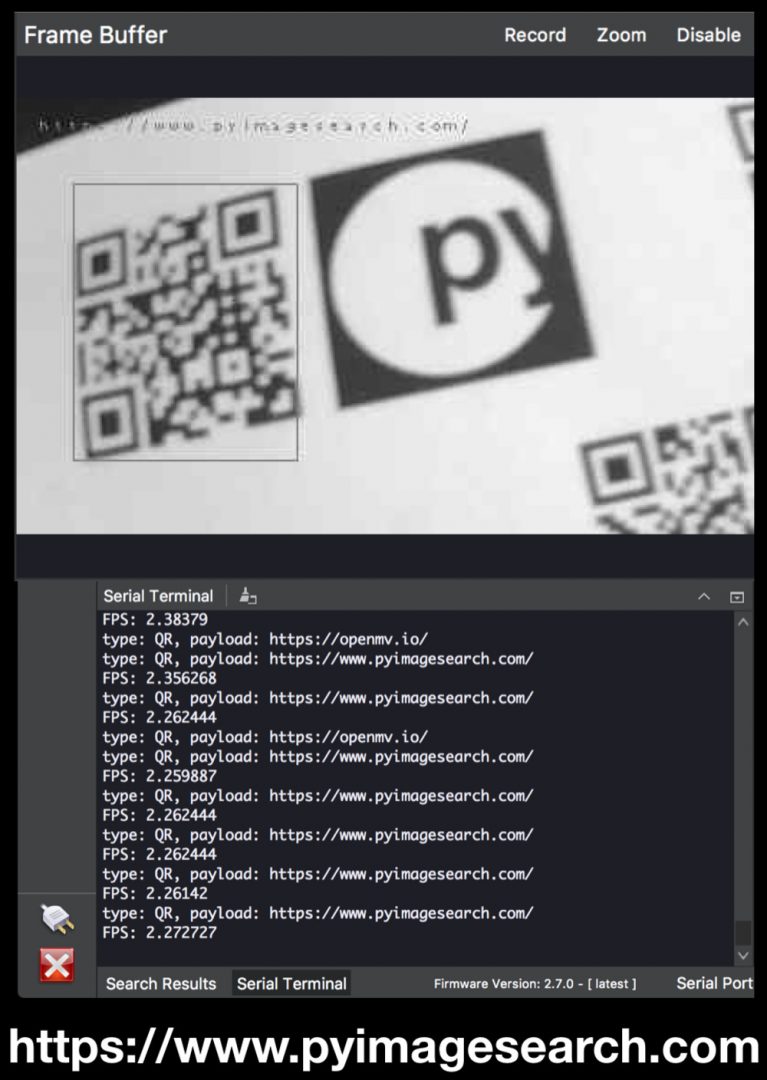
Figure 5: Scanning a QR code with a link to the PyImageSearch homepage.

Figure 6: Scanning a QR code that contains a payload of “https://openmv.io” — the OpenMV homepage.
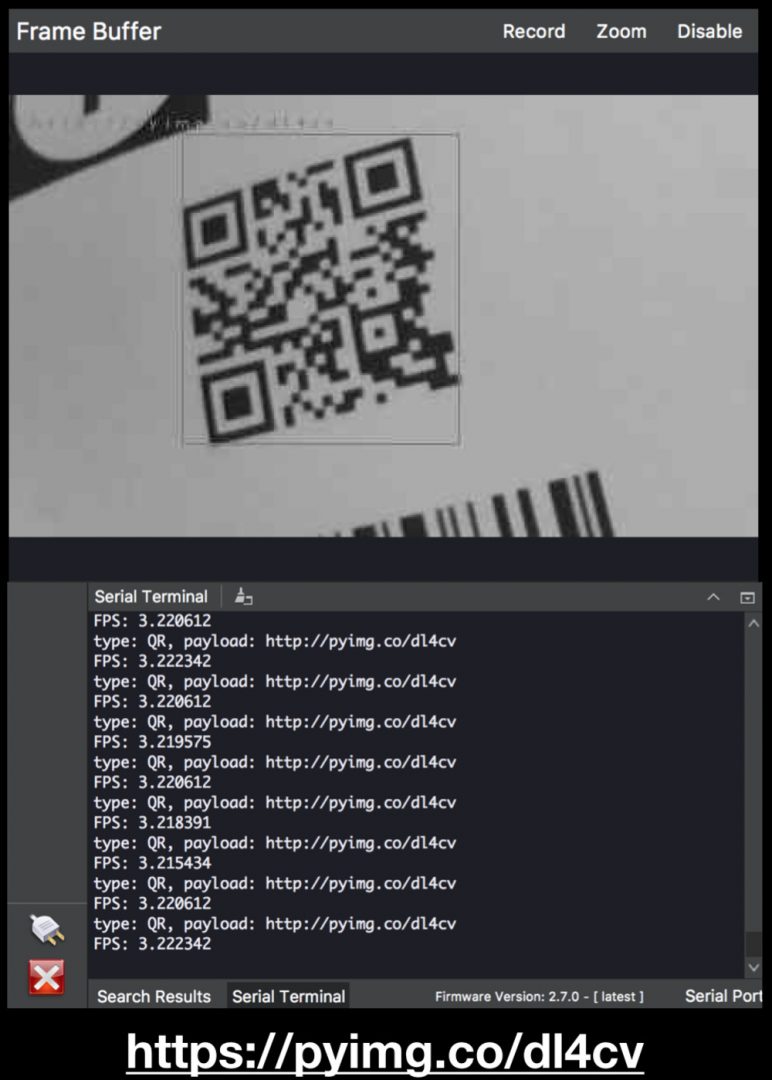
Figure 7: This QR code contains a payload directing you to the Deep Learning for Computer Vision with Python book information page.
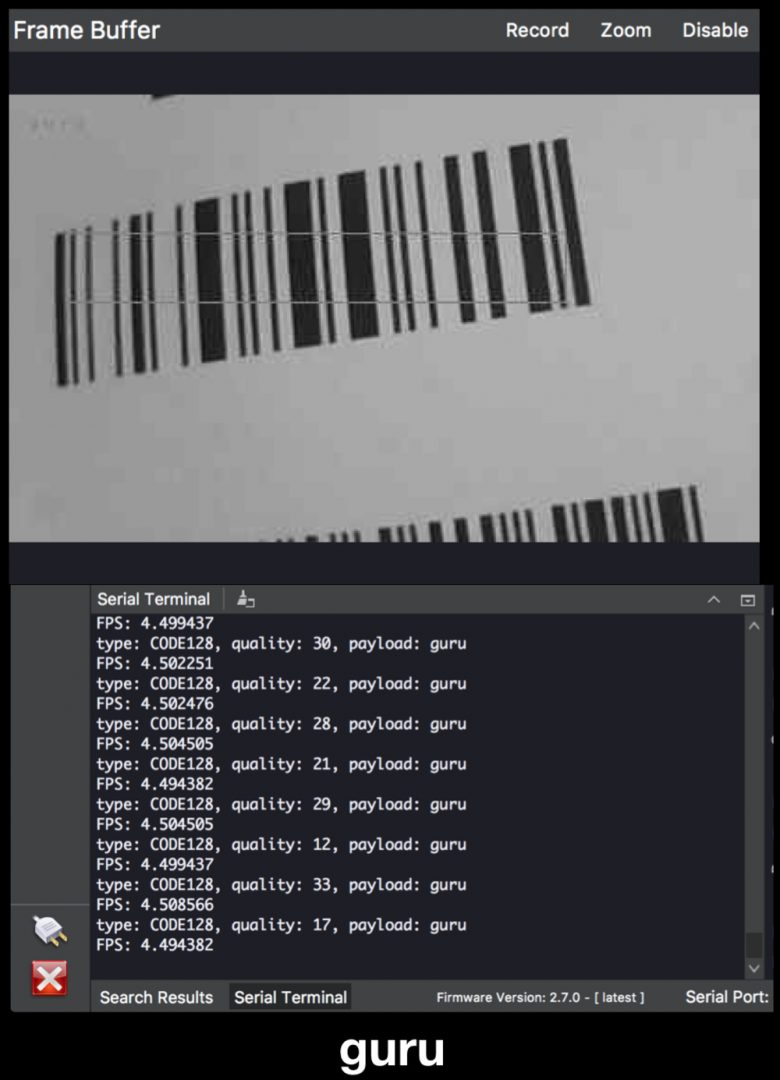
Figure 8: A CODE128 barcode that says “guru” is decoded by the OpenMV.
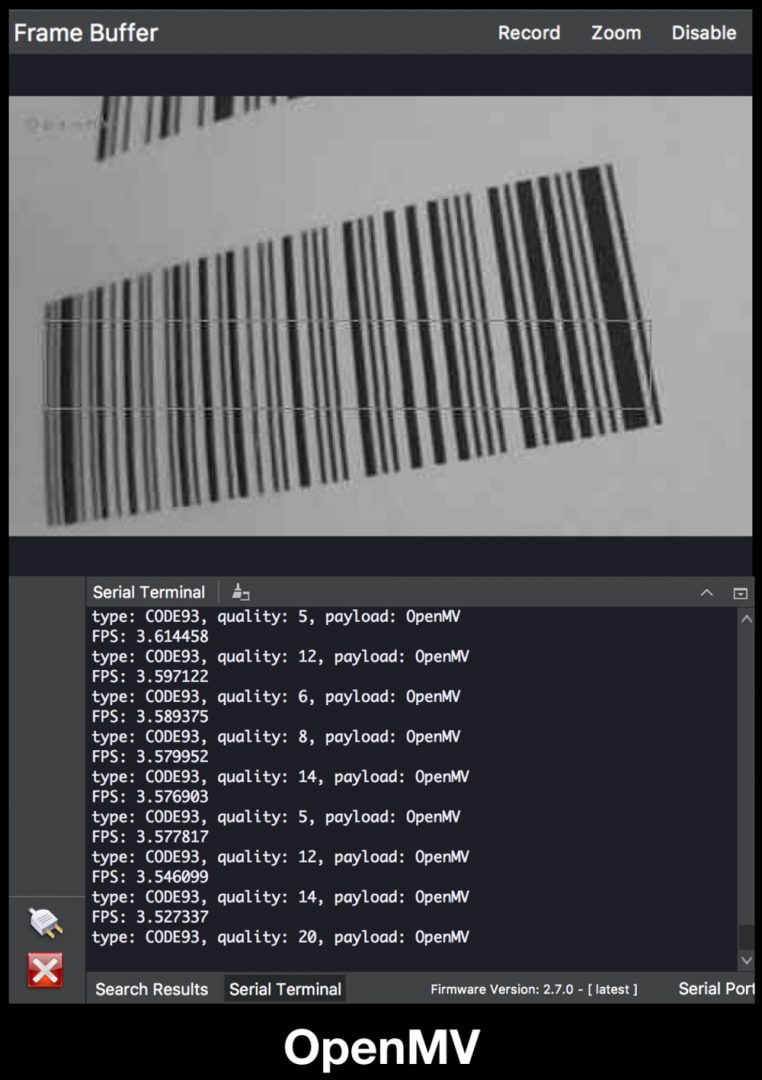
Figure 9: The OpenMV can decode CODE93 barcodes such as this one that has a payload of “OpenMV”.
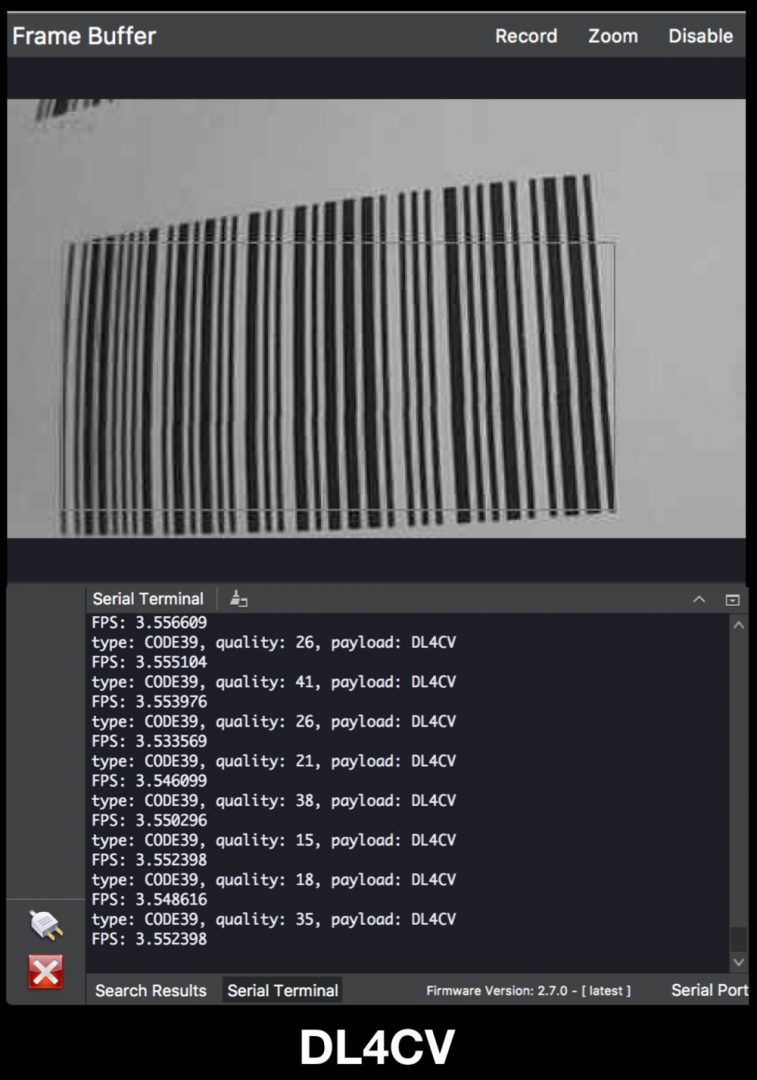
Figure 10: CODE39 barcodes are easy with the OpenMV. The Payload here is “DL4CV”.
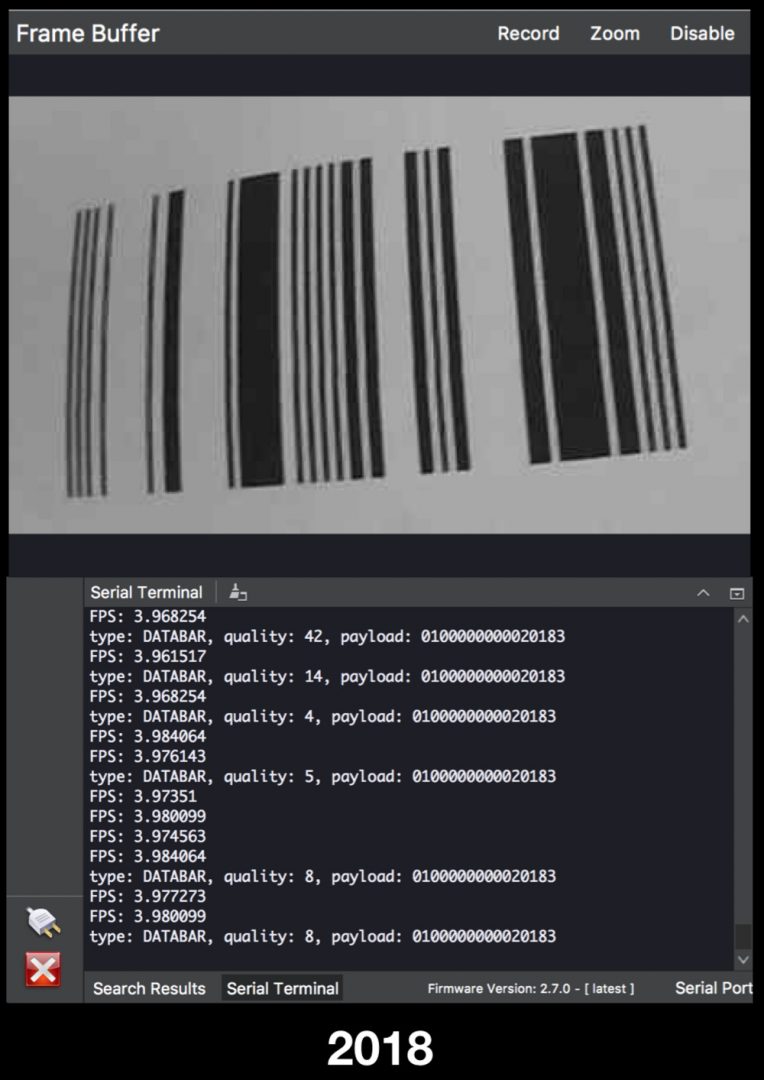
Figure 11: The OpenMV can decode DATABAR codes which are fixed-width and only contain digits. I coded “2018” into this barcode, but as you can see, the OpenMV camera actually reads 16 characters.
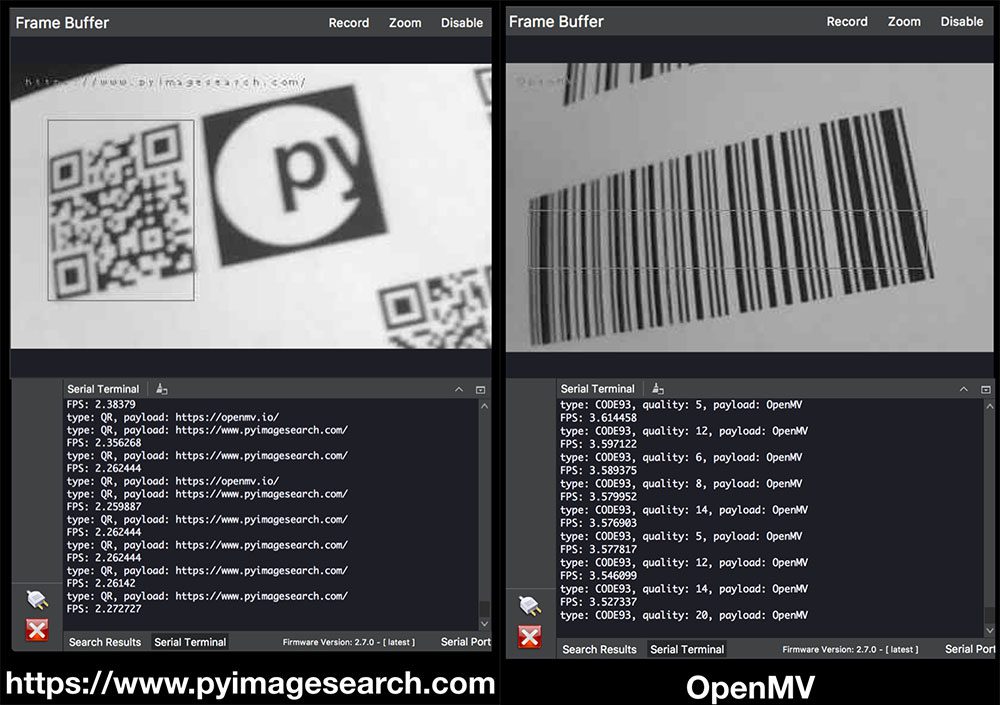
And finally, here’s a picture of the IDE in action. Notice how it is reading multiple codes, drawing boxes around the barcodes, and also contains a nice color histogram.
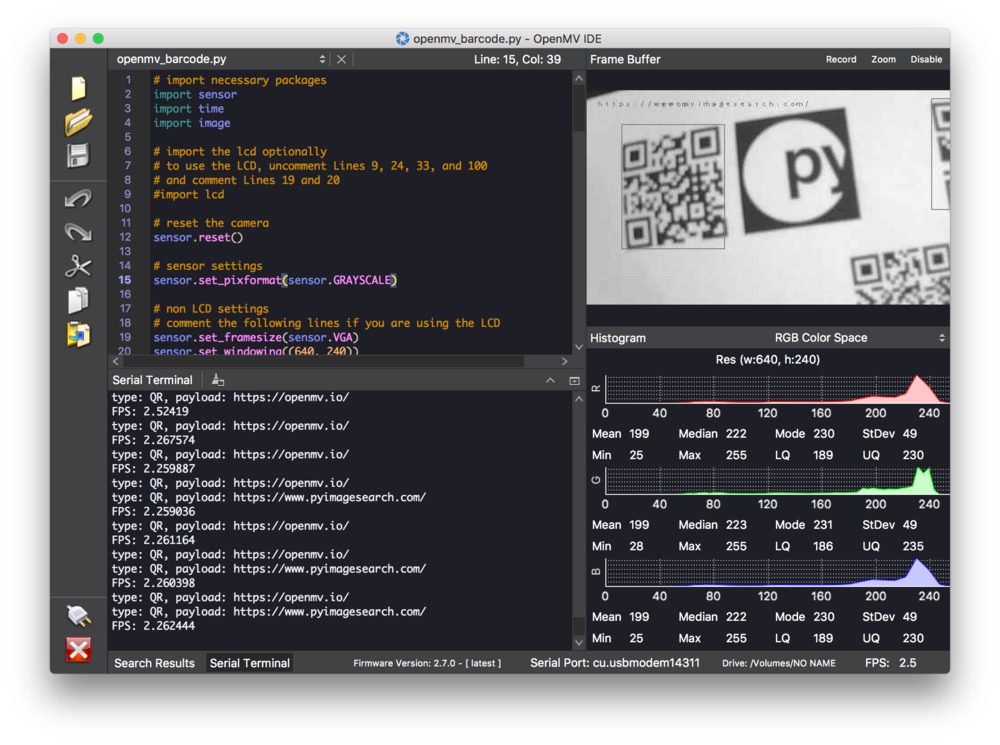
Figure 12: The OpenMV in action detecting barcodes and printing results to the IDE. As you can see, there’s a terminal in the bottom left which is scrolling data. There’s also a live view of the camera feed in the top right of the IDE and color histograms in the bottom right.
Here’s a video of the system in action using the IDE:
The IDE is great for debugging. For a deployable project however, you wouldn’t use the IDE. Instead you’d send the barcode payloads out to an actuator via I2C, SPI, or maybe WiFi to be processed in a database.
The LCD tool is also great for debugging although I found that the required resolution didn’t work for all the barcodes on the
barcodes.pdffile included in the “Downloads”.
Nevertheless, here’s the LCD in action:
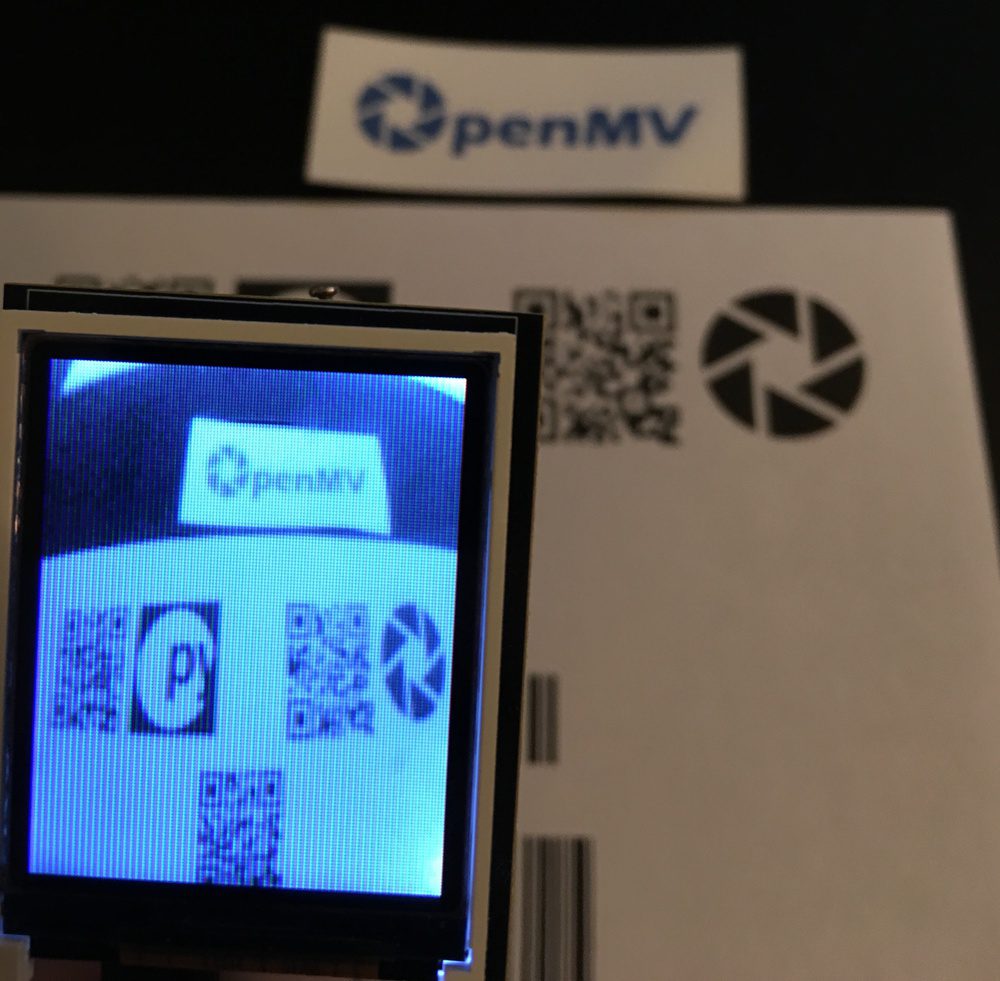
Figure 13: The OpenMV color LCD shield provides a nice viewfinder for the OpenMV. Pictured are a few barcodes for today’s blog post on decoding barcodes with the openMV.
Does the OpenMV run OpenCV?
In short, no — the OpenMV does not run OpenCV. The processor wouldn’t be able to handle it.
There are a number of capabilities of the OpenMV, but don’t think of it as a replacement for a Raspberry Pi which can run an OS and OpenCV.
But don’t let that deter you from considering the OpenMV for your project!
There’s plenty of OpenCV-like functionality built in.
You’ll feel at home working with the OpenMV examples and turning one into a solution that works in your project, but don’t expect to paste some OpenCV code into the OpenMV IDE and expect it to work.
Oh, and the best part?
You don’t need to worry about a complex install! If the OpenMV firmware needs to be updated, just click the button in the IDE and it will update over USB in a matter of minutes.
The easy install, and basic image processing capabilities make it a great teaching tool to get someone interested in CV.
It also would do well in specific projects, provided the project aligns with one of the image processing capabilities of OpenMV — just be sure that you don’t need something more powerful before you go down this path.
Can I connect the OpenMV to my Raspberry Pi?
Of course you can but there are more reasons against doing so.
The first reason is: the Raspberry Pi can do (mostly) everything the OpenMV can do, and then some. I2C? Check. SPI? Check. PWM? Check. WiFi? Check.
That said, the Raspberry Pi doesn’t have a high powered RGB LED and two high power IR LEDs like the OpenMV does.
But back to the point: Why would you need duplicate capabilities?
You most-likely don’t.
Instead, you should not think of the OpenMV as a general purpose SBC — it’s not.
The OpenMV is particularly great for specific embedded use cases. Another great use case for the OpenMV might be one where you’re concerned about power draw such as on a battery powered drone.
The second reason is that compiling the QT GUI for the Raspberry Pi would take 2-3 days. This isn’t practical. Sure you could do it once, and keep a handy .img lying around so you don’t have to do it again, but it just doesn’t seem practical to me.
So yes — you can definitely plug in the OpenMV via USB or via a custom header/wires to a Raspberry Pi. I just don’t think it is the wise thing to do.
If I’m wrong, let’s discuss in the comments section.
Where can I get an OpenMV camera as well as accessories?
Figure 7: The OpenMV is available at distributors as well as direct at openmv.io. Bulk discounts and kits are available!
The OpenMV is very affordable at $65. Think of it as getting a powerful Arduino and a camera all on one board (that runs MicroPython).
You can pick up an OpenMV Cam at the retailers listed on the sales page, and many of the retailers offer free shipping.
Notable retailers include
- SparkFun (for $65, it comes with plastic case and headers)
- Seed Studio
- Robot Shop
There are a few Chinese retailers serving Asia as well as a number of European and UK retailers.
Looking to buy in bulk for your classroom or for a deployment?
If that’s the case, then you can take advantage of the bulk discounts by ordering direct from OpenMV.io. There’s a piecewise function where you can get 10%, 20%, or even 30% off by buying in bulk.
Shields, shields, shields!
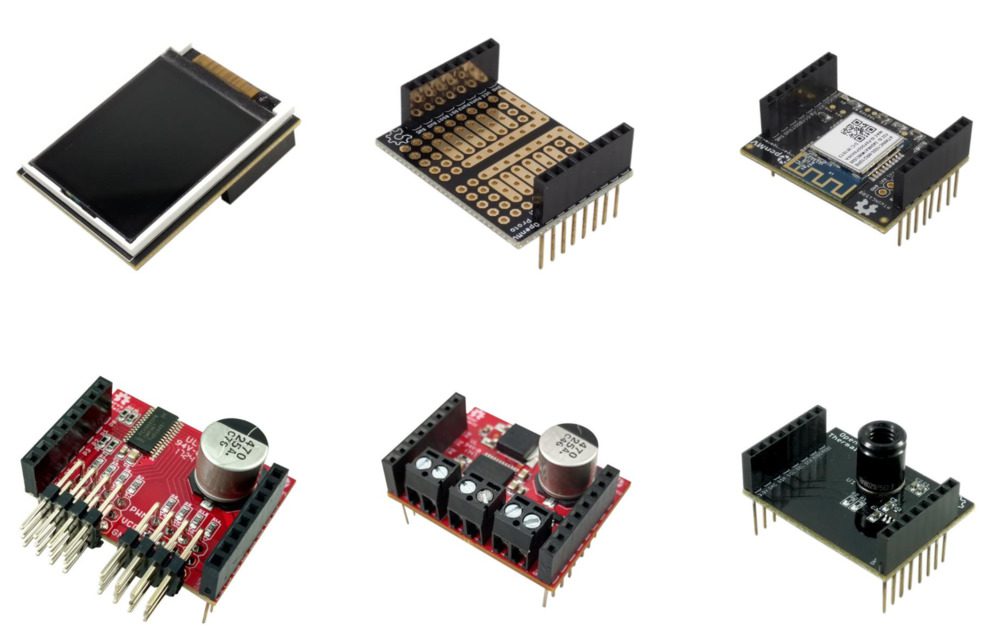
Figure 8: The OpenMV has an assortment of shields available to expand capabilities. Do you want to make your own shield? The hardware is open source, so get started with Eagle CAD or your favorite tool.
There are a number of expansion shields available, so be sure to check the retailers as well as OpenMV direct for purchasing options.
The official shields include:
- WiFi Shield (supports streaming video at 48 Mbps)
- LCD Shield (color!)
- Servo Shield (supports up to 8 servos!)
- Motor Shield (motors, solenoids, or other electromechanicals up to 2A)
- Proto Shield (connect I/O such as a sensor to your OpenMV processor)
- Thermopile Shield (thermal camera shield — it’s no longer sold, but still supported if you can find one)
You’ll need to use your soldering skills in order to attach shields — the headers do not come pre-populated. This is a minor inconvenience, but if you have a soldering iron, you can be up and running in 10 minutes.
It’s also worth noting that all hardware is open source. So if you have electronics skills and need a custom shield and are proficient in Eagle CAD, then you can visit the OpenMV Shield GitHub Repo to select a shield as a starting point to customize for your application.
Do you want a value kit that includes most accessories so you can get started tinkering?
If you order the “Full Set” kit direct from OpenMV.io, you get about 10% off the combined price.
The “Full Set” kit includes 7 pieces:
- 1 – OpenMV Cam M7
- 3 – Shields (Proto Shield, LCD Shield, WiFi Shield)
- 3 – Lenses (IR Lens, Telephoto Lens, Ultra Wide Angle Lens)
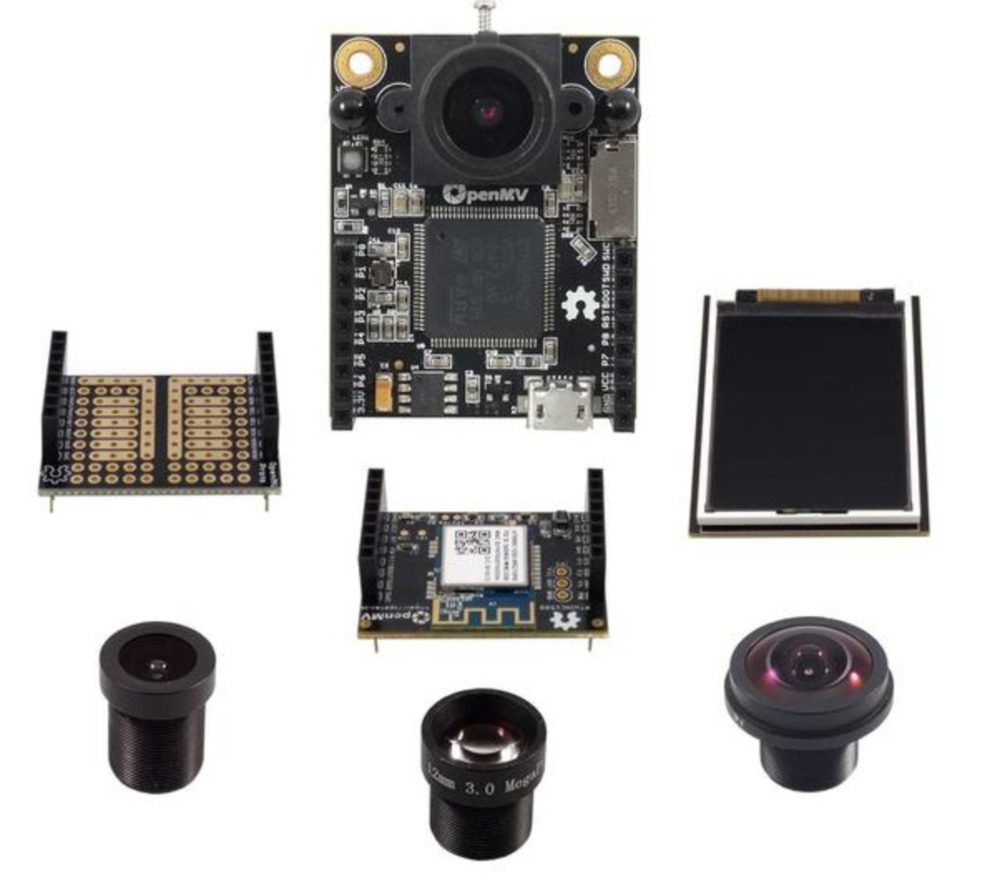
Figure 9: The OpenMV Full Set bundle is a good kit to get started with. It is 10% off versus buying the items individually.
Summary
In today’s blog post we used the OpenMV to perform barcode decoding.
Aimed at being the “Arduino of Machine Vision”, the OpenMV cam is embedded (no OS) and is expandable via several available shields. It’s also extremely easy to use. You can write code on the OpenMV using MicroPython.
However, it’s important to understand that the OpenMV does not run OpenCV — the processor simply would not be able to handle it. That said, there’s plenty of OpenCV-like functionality built in. Using the OpenMV IDE you can put together your own computer vision applications.
Next week I’ll be interviewing Kwabena Agyeman, the creator of OpenMV.
To be notified when next week’s interview with Kwabena goes live, just enter your email address in the form below!
Downloads:
The post Reading barcodes with Python and OpenMV appeared first on PyImageSearch.
from PyImageSearch http://ift.tt/2u02oiC
via IFTTT
No comments:
Post a Comment