The Ubuntu VirtualBox virtual machine that comes with my book, Deep Learning for Computer Vision with Python, includes all the necessary deep learning and computer vision libraries you need (such as Keras, TensorFlow, scikit-learn, scikit-image, OpenCV, etc.) pre-installed.
However, while the deep learning virtual machine is easy to use, it also has a number of drawbacks, including:
- Being significantly slower than executing instructions on your native machine.
- Unable to access your GPU (and other peripherals attached to your host).
What the virtual machine has in convenience you end up paying for in performance — this makes it a great for readers who are getting their feet wet, but if you want to be able to dramatically boost speed while still maintaining the pre-configured environment, you should consider using Amazon Web Services (AWS) and my pre-built deep learning Amazon Machine Image (AMI).
Using the steps outlined in this tutorial you’ll learn how to login (or create) your AWS account, spin up a new instance (with or without a GPU), and install my pre-configured deep learning image. This will enable you to enjoy the pre-built deep learning environment without sacrificing speed.
To learn how to use my deep learning AMI, just keep reading.
Pre-configured Amazon AWS deep learning AMI with Python
In this tutorial I will show you how to:
- Login/create your AWS account.
- Launch my pre-configured deep learning AMI.
- Login to the server and execute your code.
- Stop the machine when you are done.
However, before we get too far I want to mention that:
- The deep learning AMI is Linux-based so I would recommend having some basic knowledge of Unix environments, especially the command line.
- AWS is not free and costs an hourly rate. Exactly how much the hourly rate depends is on which machine you choose to spin up (no GPU, one GPU, eight GPUs, etc.). For less than $1/hour you can use a machine with a GPU which will dramatically speedup the training of deep neural networks. You pay for only the time the machine is running. You can then shut down your machine when you are done.
Step #1: Setup Amazon Web Services (AWS) account
In order to launch my pre-configured deep learning you first need an Amazon Web Services account.
To start, head to the Amazon Web Services homepage and click the “Sign In to the Console” link:
Figure 1: The Amazon Web Services homepage.
If you already have an account you can login using your email address and password. Otherwise you will need to click the “Create a new AWS account” button and create your account:
Figure 2: Logging in to your Amazon Web services account.
I would encourage you to use an existing Amazon.com login as this will expedite the process.
Step #2: Select and launch your deep learning AWS instance
You are now ready to launch your pre-configured deep learning AWS instance.
First, you should set your region/zone to “US West (Oregon)”. I created the deep learning AMI in the Oregon region so you’ll need to be in this region to find it, launch it, and access it:
Figure 3: Setting your AWS region to “US West (Oregon)”.
After you have set your region to Oregon, click the “Services” tab and then select “EC2” (Elastic Cloud Compute):
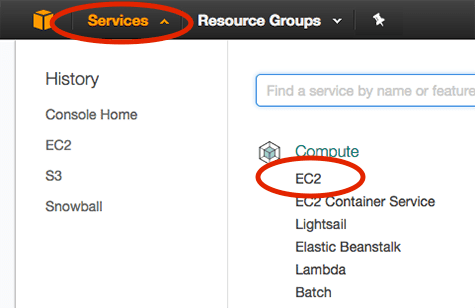
Figure 4: Accessing the Amazon EC2 dashboard.
From there you should click the “Launch Instance” button:
Figure 5: Launching an Amazon AWS instance for deep learning.
Then select the “Community AMIs” and search for either “deep-learning-for-computer-vision-with-python” or “ami-ccba4ab4”:
Figure 6: Searching for the Deep Learning for Computer Vision with Python AMI.
Click “Select” next to the AMI.
You are now ready to select your instance type. Amazon provides a huge number of virtual servers that are designed to run a wide array of applications. These instances have varying amount of CPU power, storage, network capacity, or GPUs, so you should consider:
- What type of machine you would like to launch.
- Your particular budget.
GPU instances tend to cost much more than standard CPU instances. However, they can train deep neural networks in a fraction of the time. When you average out the amount of time it takes to train a network on a CPU versus on a GPU you may realize that using the GPU instance will save you money.
For CPU instances I recommend you use the “Compute optimized” c4.* instances. In particular, the c4.xlarge instance is a good option to get your feet wet.
If you would like to use a GPU, I would highly recommend the “GPU compute” instances. The p2.xlarge instance has a single NVIDIA K80 (12GB of memory).
The p2.8xlarge sports 8 GPUs. While the p2.16xlarge has 16 GPUs.
I have included the pricing (at the time of this writing) for each of the instances below:
- c4.xlarge: $0.199/hour
- p2.xlarge: $0.90/hour
- p2.8xlarge: $7.20/hour
- p2.16xlarge: $14.40/hour
As you can see, the GPU instances are much more expensive; however, you are able to train networks in a fraction of the cost, making them a more economically viable option. Because of this I recommend using the p2.xlarge instance if this is your first time using a GPU for deep learning.
In the example screenshot below you can see that I have chosen the p2.xlarge instance:
Figure 7: Selecting the p2.xlarge instance for deep learning using the GPU.
Next, I can click “Review and Launch” followed by “Launch” to boot my instance.
After clicking “Launch” you’ll be prompted to select your key pair or create a new key pair:
Figure 8: Selecting a key pair for our Elastic Cloud Compute instance.
If you have an existing key pair you can select “Choose an existing key pair” from the drop down. Otherwise you’ll need to select the “Create a new key pair” and then download the pair. The key pair is used to login to your AWS instance.
After acknowledging and accepting login note from Amazon your instance will start to boot. Scroll down to the bottom of the page and click “View Instances”. It will take a minute or so for your instance to boot.
Once the instance is online you’ll see the “Instance State” column be changed to “running” for the instance.
Select it and you’ll be able to view information on the instance, including the IP address:
Figure 9: Examining the IP address of my deep learning AWS instance.
Here you can see that my IP address is
52.88.146.157. Your IP address will be different.
Fire up a terminal and you can SSH into your AWS instance:
$ ssh -i EC2KeyPair.pem ubuntu@52.88.146.157
You’ll want to update the command above to:
- Use the filename you created for the key pair.
- Use the IP address of your instance.
Step #3: (GPU only) Re-install NVIDIA deep learning driver
If you selected a GPU instance you’ll need to re-install the NVIDIA deep learning driver. I’m not entirely sure why this step is required, but each time I’ve rebooted my system the driver needed to be re-installed.
Luckily this is easy as I have included the driver file in the home directory of the instance.
If you list the contents of the
installersdirectory you’ll see three files:
$ ls -l installers/
total 1435300
-rwxr-xr-x 1 root root 1292835953 Sep  6 14:03 cuda-linux64-rel-8.0.61-21551265.run
-rwxr-xr-x 1 root root  101033340 Sep  6 14:03 cuda-samples-linux-8.0.61-21551265.run
-rwxr-xr-x 1 root root   75869960 Sep  6 14:03 NVIDIA-Linux-x86_64-375.26.run
Change directory into
installersand then execute the following command:
$ cd installers
$ sudo ./NVIDIA-Linux-x86_64-375.26.run
Follow the prompts on screen (including overwriting any existing NVIDIA driver files) and your NVIDIA deep learning driver will be installed.
You can validate the NVIDIA driver installed successfully by running the
nvidia-smicommand:
$ nvidia-smi
Wed Sep 13 12:51:43 2017
+-----------------------------------------------------------------------------+
| NVIDIA-SMI 375.26                 Driver Version: 375.26                    |
|-------------------------------+----------------------+----------------------+
| GPU  Name        Persistence-M| Bus-Id        Disp.A | Volatile Uncorr. ECC |
| Fan  Temp  Perf  Pwr:Usage/Cap|         Memory-Usage | GPU-Util  Compute M. |
|===============================+======================+======================|
|   0  Tesla K80           Off  | 0000:00:1E.0     Off |                    0 |
| N/A   43C    P0    59W / 149W |      0MiB / 11439MiB |     97%      Default |
+-------------------------------+----------------------+----------------------+

+-----------------------------------------------------------------------------+
| Processes:                                                       GPU Memory |
|  GPU       PID  Type  Process name                               Usage      |
|=============================================================================|
|  No running processes found                                                 |
+-----------------------------------------------------------------------------+
Step #4: Access deep learning Python virtual environment on AWS
You can access our deep learning and computer vision libraries by using the
workon dl4cvcommand to access the Python virtual virtual environment:
Figure 10: Accessing the dl4cv Python virtual environment for deep learning.
Notice that my prompt now has the text
(dl4cv)preceding it, implying that I am inside the
dl4cvPython virtual environment.
You can run
pip freezeto see all the Python libraries installed.
I have included a screenshot below demonstrating how to import Keras, TensorFlow, mxnet, and OpenCV from a Python shell:
Figure 11: Importing Keras, TensorFlow, mxnet, and OpenCV into our deep learning Python virtual environment.
The code + datasets to Deep Learning for Computer Vision with Python are not included on the pre-configured AMI by default (as the AMI is publicly available and can be used for tasks other than reading through Deep Learning for Computer Vision with Python).
To upload the code from the book on your local system to the AMI I would recommend using the
scpcommand:
$ scp -i EC2KeyPair.pem ~/Desktop/sb_code.zip ubuntu@52.88.146.157:~
Here I am specifying:
- The path to the
.zip
file of the Deep Learning for Computer Vision with Python code + datasets. - The IP address of my Amazon instance.
From there the
.zipfile is uploaded to my home directory.
You can then unzip the archive and execute the code:
$ unzip sb_code.zip
$ cd sb_code/chapter12-first_cnn/
$ workon dl4cv
$ python shallownet_animals.py --dataset ../datasets/animals
Using TensorFlow backend.
[INFO] loading images...
...
Epoch 100/100
2250/2250 [==============================] - 0s - loss: 0.3429 - acc: 0.8800 - val_loss: 0.7278 - val_acc: 0.6720
[INFO] evaluating network...
             precision    recall  f1-score   support

        cat       0.67      0.52      0.58       262
        dog       0.59      0.64      0.62       249
      panda       0.75      0.87      0.81       239

avg / total       0.67      0.67      0.67       750
Step #5: Stop your deep learning AWS instance
Once you are finished working with your AMI head back to the “Instances” menu item on your EC2 dashboard and select your instance.
With your instance selected click “Actions => Instance State => Stop”:
Figure 12: Stopping my deep learning AWS instance.
This process will shutdown your deep learning instance (and you will no longer be billed hourly for it).
If you wanted to instead delete the instance you would select “Terminate”.
Troubleshooting and FAQ
In this section I detail answers to frequently asked questions and problems regarding the pre-configured deep learning AMI.
How do I execute code from Deep Learning for Computer Vision with Python from the deep learning AMI?
Please see the “Access deep learning Python virtual environment on AWS” section above. The gist is that you will upload a
.zipof the code to your AMI via the
scpcommand. An example command can be seen below:
$ scp -i EC2KeyPair.pem path/to/code.zip ubuntu@your_aws_ip_address:~
Can I use a GUI/window manager with my deep learning AMI?
No, the AMI is terminal only. I would suggest using the deep learning AMI if you are:
- Comfortable with Unix environments.
- Have experience using the terminal.
Otherwise I would recommend the deep learning virtual machine part of Deep Learning for Computer Vision with Python instead.
How can I use a GPU instance for deep learning?
Please see the “Step #2: Select and launch your deep learning AWS instance” section above. When selecting your Amazon EC2 instance choose a p2.* (i.e., “GPU compute”) instance. These instances have one, eight, and sixteen GPUs, respectively.
Summary
In today’s blog post you learned how to use my pre-configured AMI for deep learning in the Amazon Web Services ecosystem.
The benefit of using my AMI over the pre-configured virtual machine is that:
- Amazon Web Services and the Elastic Cloud Compute ecosystem give you a huge range of systems to choose from, including CPU-only, single GPU, and multi-GPU.
- You can scale your deep learning environment to multiple machines.
- You retain the ability to use pre-configured deep learning environments but still get the benefit of added speed via dedicated hardware.
The downside is that AWS:
- Costs money (typically an hourly rate).
- Can be daunting for those who are new to Unix environments.
After you have gotten your feet wet with deep learning using my virtual machine I would highly recommend that you try AWS out as well — you’ll find that the added speed improvements are worth the extra cost.
To learn more, take a look at my new book, Deep Learning for Computer Vision with Python.
The post Pre-configured Amazon AWS deep learning AMI with Python appeared first on PyImageSearch.
from PyImageSearch http://ift.tt/2fhmz1e
via IFTTT
No comments:
Post a Comment